If you think wedding branding is just for celebrities, influencers and those with a huge budget, think again! Wedding branding sounds pretty fancy and intimidating, but I promise, it’s a lot simpler than it sounds. It’s really just creating a set of guidelines to help create an overall look and feel that’s cohesive and very ‘you’. Your wedding branding will help tie the whole wedding look together, it’ll help you make easy design decisions, you’ll be able to communicate really clearly with suppliers and you’ll be more focused and streamlined while planning. What a win!
To nail your wedding branding is not to say everything has to be perfect. It’s really about defining what you want your celebration to be about, visually and emotionally. You can then bring this to life with the colours you choose, the way you personalise the wedding, your style and any thoughtful details.
Are you ready to nail your wedding branding and colours? Take a look at this step-by-step guide and the examples included.
Step 1: Keywords
Another fancy word, but a really simple task. Your keywords will help describe what you and your Other Half want for your wedding. They will be the words that describe the look and feel you’re going for and anything that’s unique about your wedding. Here are some questions to help you create wedding branding keywords:
- How do we describe our design style or fashion sense?
- Do we have any hobbies, interests or passions we can include in our wedding style?
- What photography style do we like most? Light and airy, colourful and vibrant, dark and moody?
- Which season are we getting married in? Is a seasonal colour palette something we want?
- What would we like our guests to say about our wedding when it’s finished?
The answers to the above questions will help you create 5-10 keywords and these will aid you in making good design and planning decisions!
Here are 5 words I’d use as an example: modern, rustic, inclusive, earthy, intimate.
Step 2: Images
You’ve got your keywords so now it’s time to find the images that match the vibe you’re going for. Curate a collection of images that all match your keywords to depict the style and feel of your wedding. This is where Pinterest comes in handy!
Pin anything that inspires you and don’t be limited to wedding photos only. You might want to include typography, interior design or interesting textures and patterns that match your style. As long as they fit with your keywords, they can be included!
Here’s an image I found on Pinterest that matches some of my keywords (remember I used words like modern and earthy!):
Step 3: Mood board
Wondering what a mood board is? It’s a collage of images, text, patterns and colours. Having a wedding mood board will help you and your suppliers keep on track with the wedding vision. You could stay old school and use magazine clippings and glue or you could go digital with a free tool like Canva.
Choose about 10 photos from your Pinterest images and make sure they coordinate well together. This doesn’t mean they have to be too matchy, you just want a cohesive look.
Does your mood board feel consistent with the keywords you jotted down earlier? Do you love it? Then great!
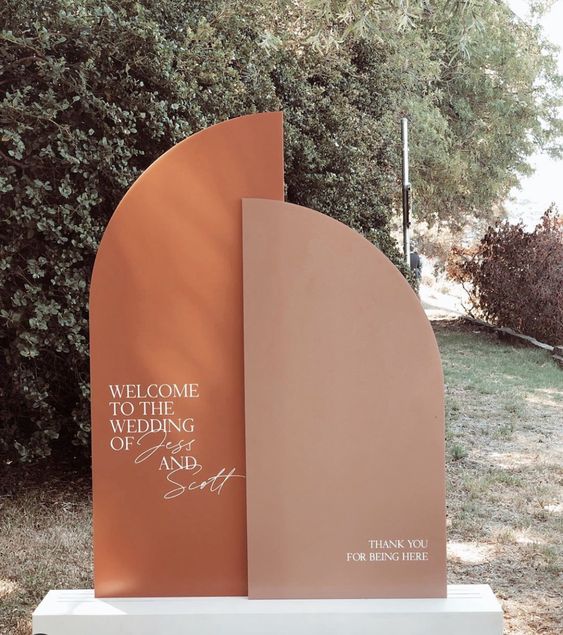
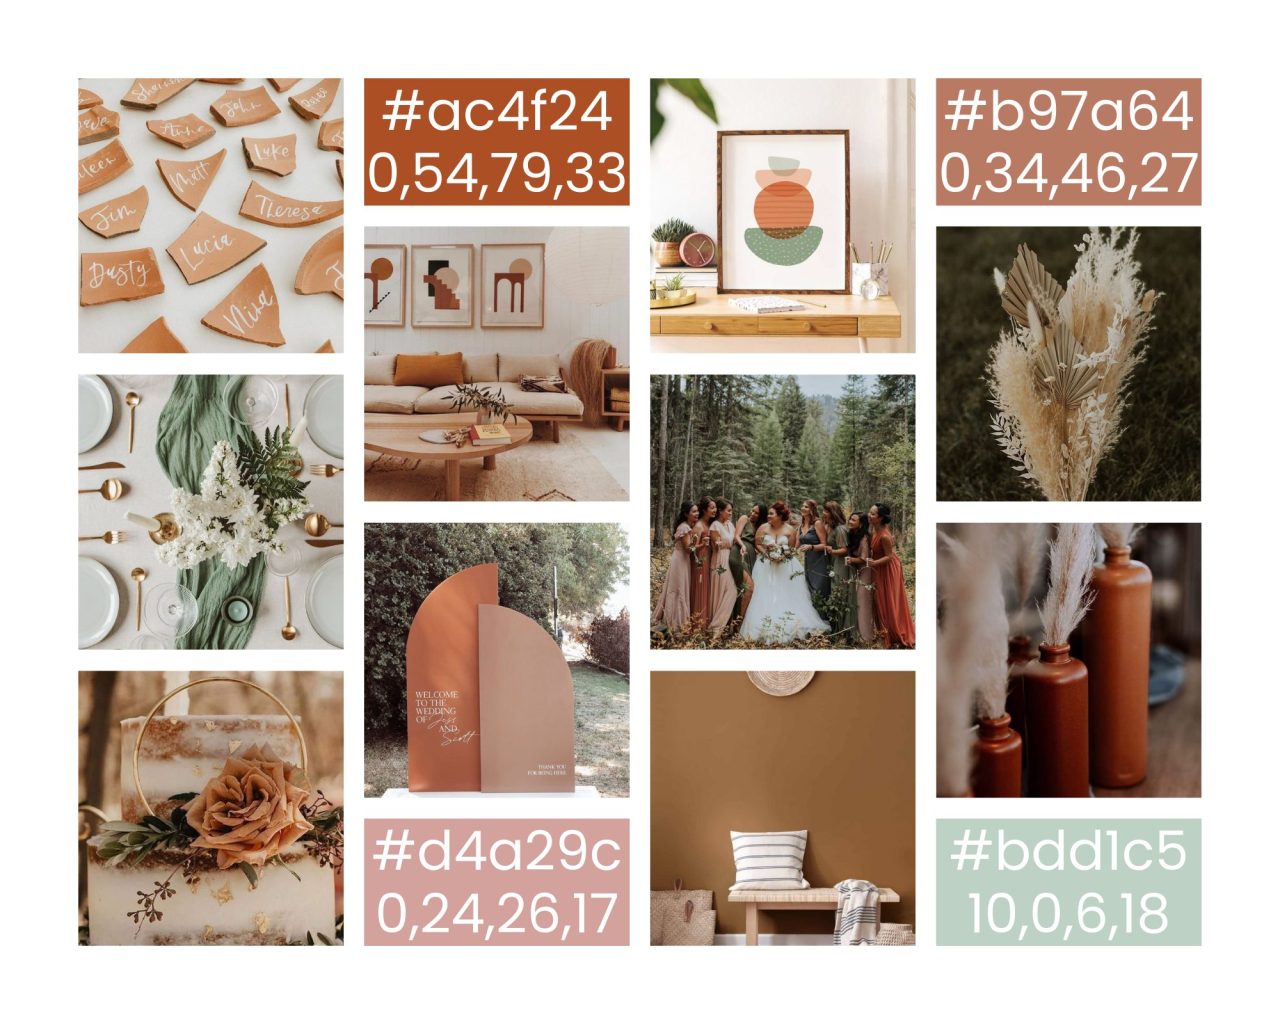
Here’s a mood board I made with an ‘Earthy Tones’ theme:
Step 4: Colours
A big part of wedding branding is settling on the colours you want to incorporate into your decor and style! Choose 2-4 colours and have a nice mix of dark and light for a good contrast.
Accentuate your wedding colour palette with HEX codes for web and CMYK colour codes for print. Not sure what those mean? You can find HEX codes on Canva (a 6 digit code that begins with a #) and this HEX to CMYK converter is helpful for print!
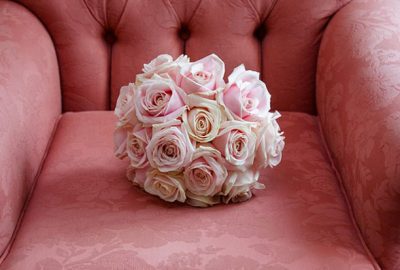
You can see my HEX and CMYK colours in the mood board above. Here’s a lovely photo from Pinterest that includes similar shades:

Step 5: Fonts
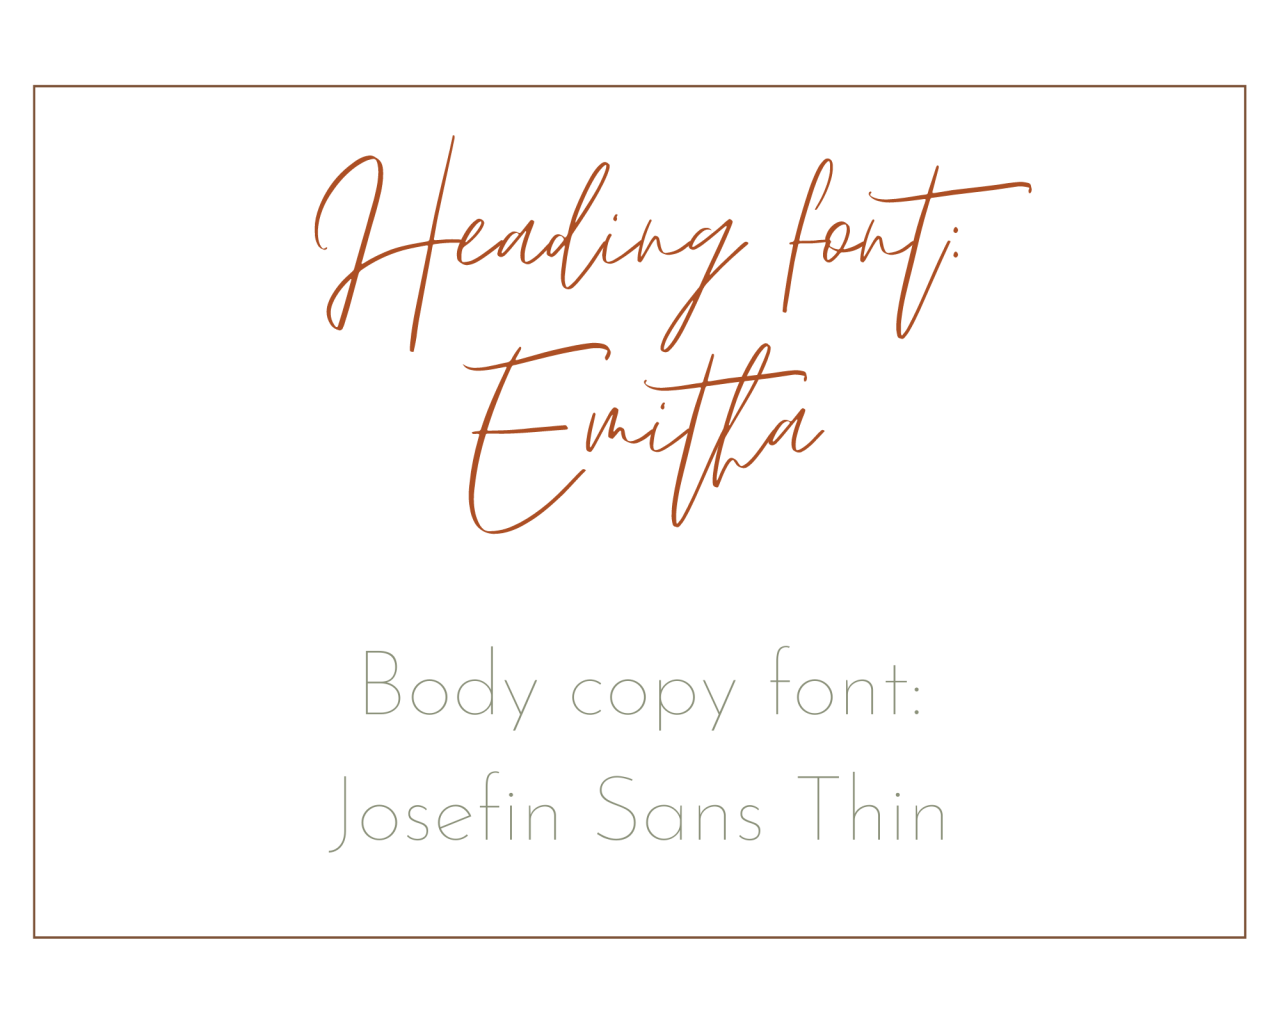
Select 2-3 wedding fonts that you can use throughout your wedding website and stationery. You want a heading font, a font for body copy and, if appropriate, an accent font too.
While you’re thinking about fonts, consider whether or not you want a wedding logo or motif. It’s completely optional and would give you a beautiful symbol that you can include in your wedding design.
This is what I chose (I opted for a pretty heading font and a simple and delicate body copy font):
Step 6: Where to use your branding
This is the fun part! You’ve nailed your wedding branding so where do you get to use it? Well, your colour palette, inspo boards, fonts and keywords will guide you and help bring your branding to life. Here are some places to start:
- Wedding website
- Save the dates and invitations
- Other printed stationery
- Wedding day signs
- Table numbers
- Linens
- Place settings
- Stickers or labels for favours
- Wedding cake and desserts
- The colour or name of your signature cocktail (if you’re having one!)

Step 7: Be consistent
The point of wedding branding is to keep your wedding design streamlined and cohesive. You’ll stay focused and your design decisions will be so much easier to make. To avoid second-guessing yourself, keep referring back to your mood board and keywords.
With that in mind, don’t stress about things that don’t match perfectly. If the napkins don’t perfectly match the bridesmaids’ dresses, that’s ok. Nobody will even notice! The main point is to translate the feeling of your mood board to your wedding so your guests have the best time.