Shredding for the wedding with West Coast Fitness
Getting your wedding planned and organised can be a stressful and taxing organisational bubble. But it will all pay off in the end. Getting in shape for your wedding, and looking your best can be just as taxing and time-consuming. But it doesn’t have to be. With a few key tips to follow and setting aside 30-40 minutes of your valuable time aside 3 to 4 times per week (or more), you’d be surprised at the results you will be able to achieve in a couple of weeks.
Firstly, be realistic about what you want to achieve in your allowed transformation time frame. If possible give yourself at least 6 weeks to give yourself the best chance at reaching your realistic goals.
A few rules of body transformation:
- Set a realistic goal – either on weight, toning or even just eating better to feel better and more energetic.
- Write it down somewhere.
- Set your timeframe.
- Break your goal down into smaller timeframes.
- Ask yourself ‘How hard am I prepared to work for this?’
- If you fail, embrace temporary failure to make you work harder and bounce back stronger.
- Self-Belief, once you have belief, the journey isn’t easy, but it is possible, it will all fall into place.
To get a toned body, three things are needed. Training (which we’ll cover at the end), nutrition and motivation (get others around you to help keep you motivated).
Nutrition
Food plays a massive role in getting you to your end result. There are so many diet plans out there at the moment, making it hard to decide which one to follow and which one will work for you. Because food is such a huge part in our lives and can have such a big impact on getting those results we desire, it is probably the hardest part of a transformation to get right and stick to. What I’d recommend is no fad or anything strange, but good energy-giving healthy food, and the reasons why you’d want to eat these foods if you are looking to transform.
You should be eating natural foods, so stay away from all processed foods, which are high in sugar. Keep the carbs down by just eating fruit and vegetables as you carbohydrate sources. And finally, eat a good healthy amount of protein to keep muscle fibers strong and help repair them.
Definitely for the first 2 weeks of your transformation plan try stick to a low carb food plan. Why?
- Motivation levels are high at the start, making a low carb diet easier to stick to.
- Body fat levels are at their highest – with a low carb diet, the body will attack the body’s fat storages for energy, burning fat.
After two weeks low carb diet, more integration of more carb-rich foods can be introduced gradually, as it is very hard to sustain a low carb diet for a long period of time. The low carb diet can be done in 2 week bursts through the transformation period.
So without exercising, you are burning fat.
Now for the extra push.
Training
When it comes to training and exercise in a busy schedule, you need to make time for it and actually put in your diary as part of your daily to-do lists. Set aside at least 30 minutes and with those 30 minutes, you can truly do a results-giving workout… at home.
The structure of your workout will stay the same but the intensity and difficulty will depend on your fitness level and also the progress you make over the transformation weeks. Initially, no equipment would be necessary but a very small investment of resistance band will add a bit extra to your workouts as well. A combination of resistance training and the odd walk/run every other day will make you reap the benefits of eating well and training regularly.
A few exercises and their descriptions that will be included in the sample workout.
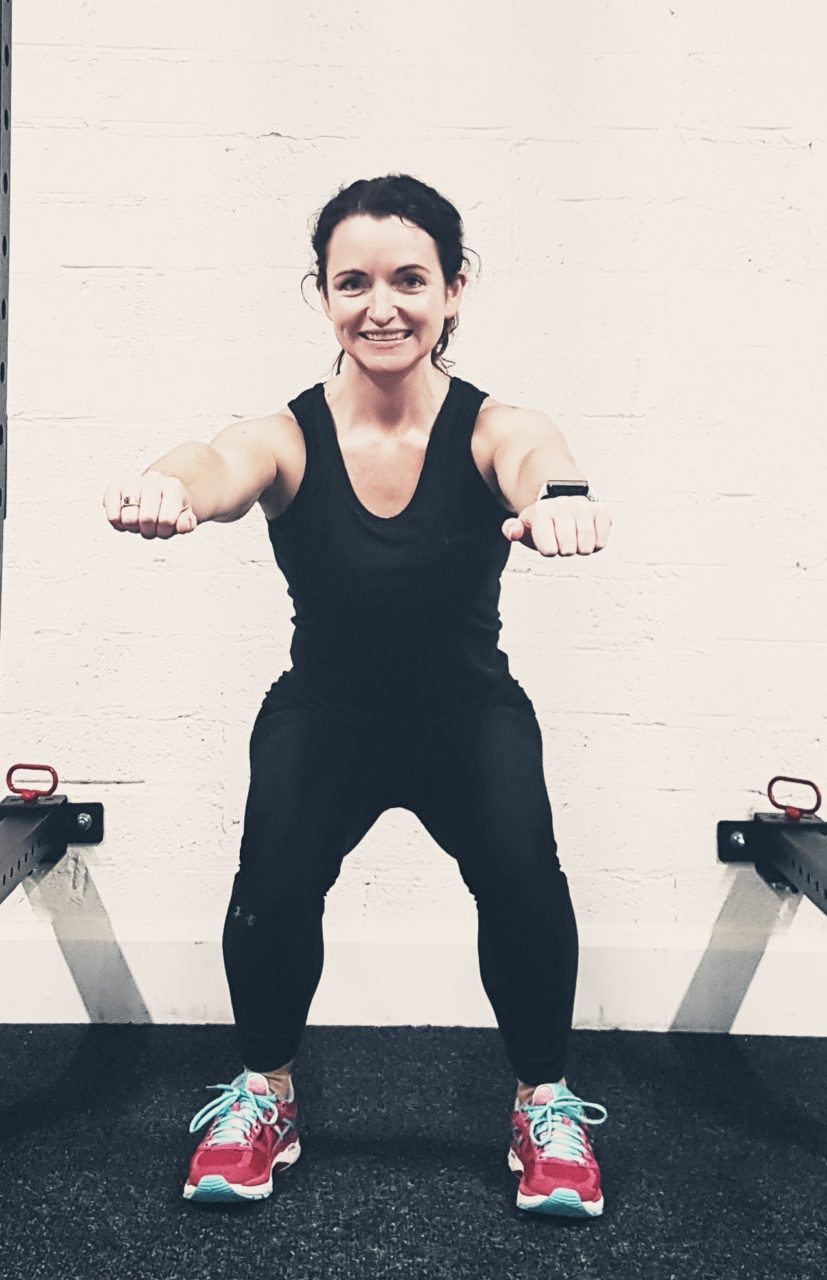
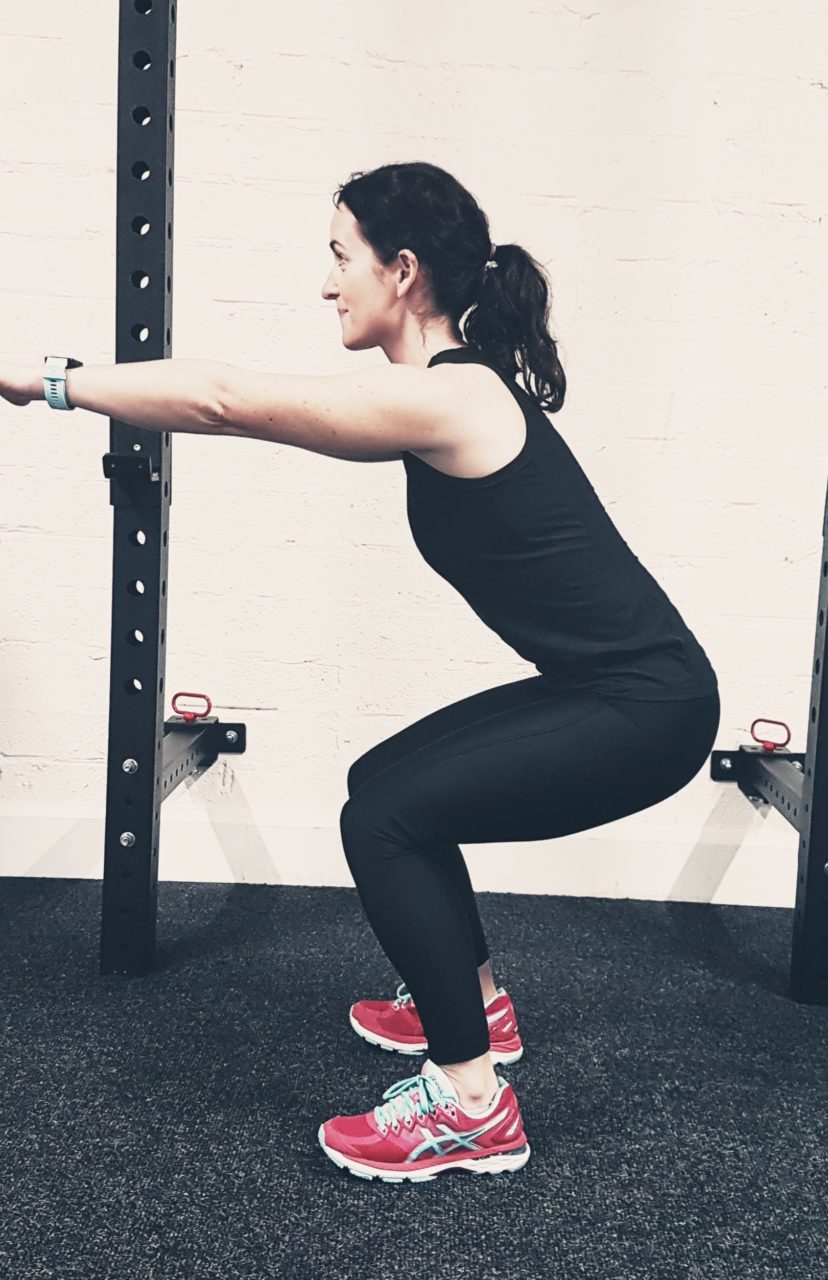
Squats
- Adopt a wide standing stance with your hands out in front. This will be your starting position.
- To initiate the movement, inhale and bend at your knees and hips to descend your pelvis either in line or just past your knees. Tip: Keep a straight back throughout and maintain good posture.
- Once you get to the bottom of the movement, exhale and press through your heels to extend your hip and knee joints, elevating your torso back along the same path into the starting position.
- Repeat for the recommended amount of repetitions.
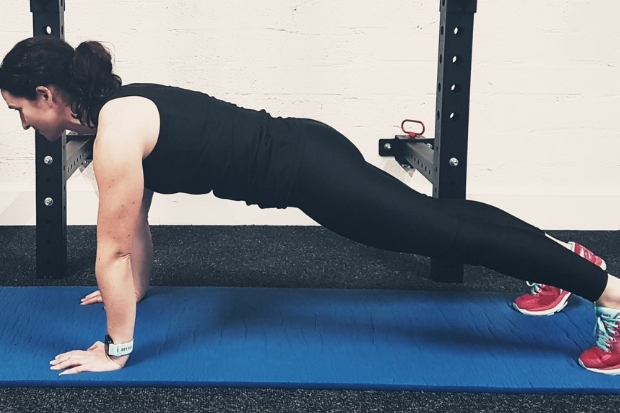
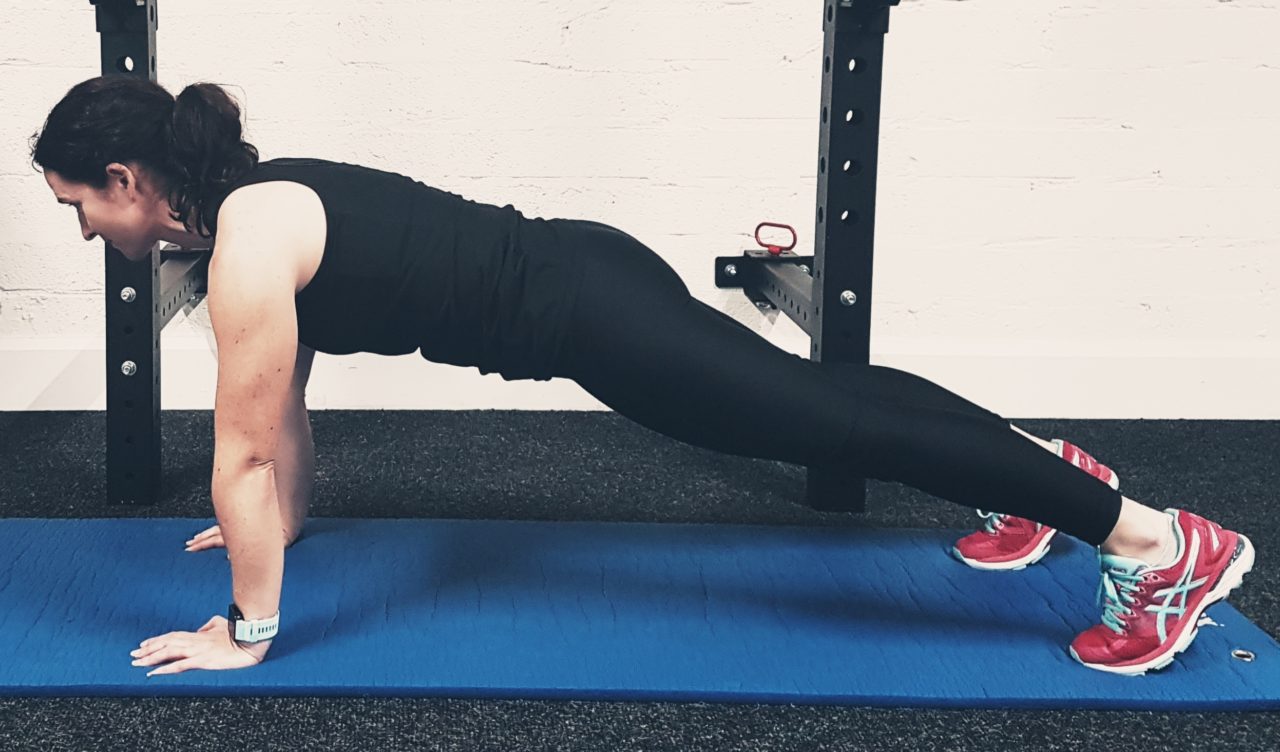
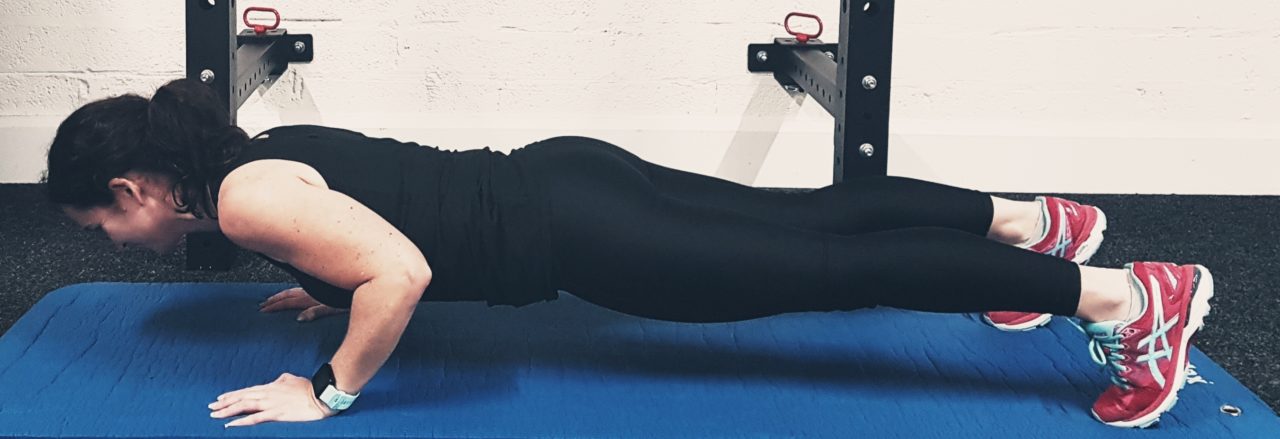
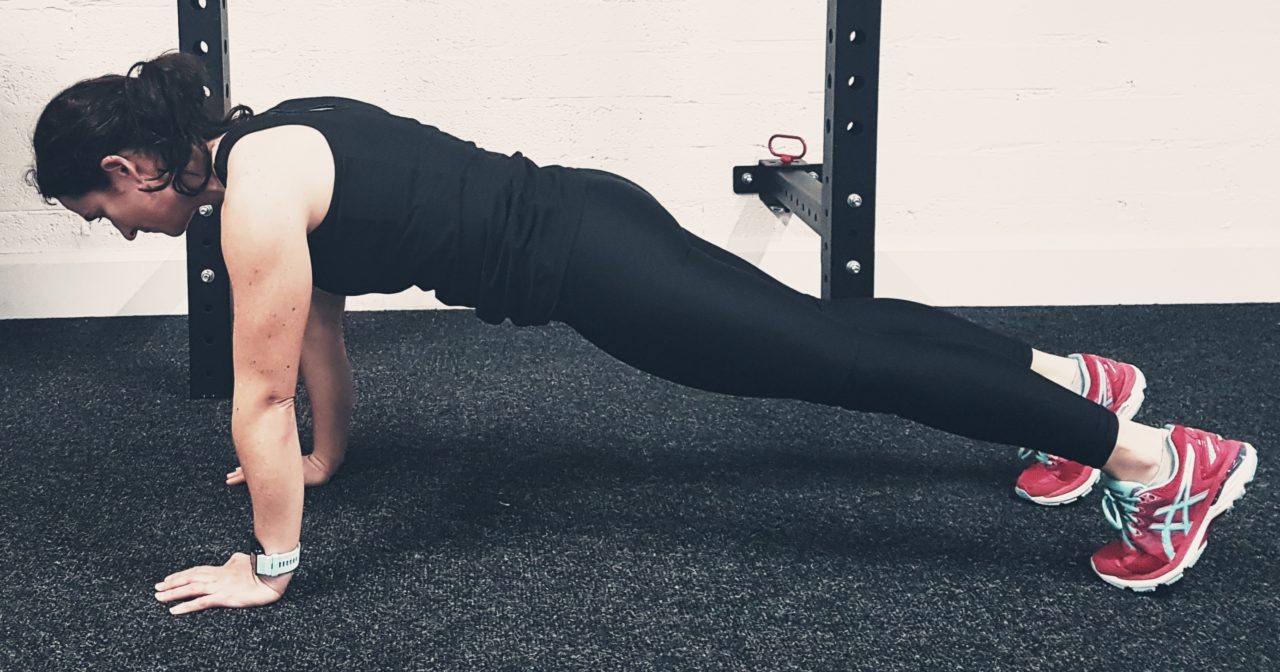
Push ups
- To start this exercise kneel down on the floor, and lean forward so that you are now weight bearing on your arms. Have your hands placed just outside of where your chest would be. Your body should be in one straight line from head to toe and your arms perpendicular to the floor under your chest. This will be your starting position. If you are a beginner, start on your knees.
- Whilst inhaling, slowly lower your chest towards the ground whilst flaring your elbows out wide. When you are about an inch or so from the ground, you should have created a triangle with your hand positions and your eye line.
- Pause for a brief movement, exhale and press through your palms to return your body along the same path to the starting position. Tip: Squeeze your pectoral muscles as you do so and when you get to the top of the movement, do not lock your elbows out.
- Repeat the movement for the recommended amount of repetitions.
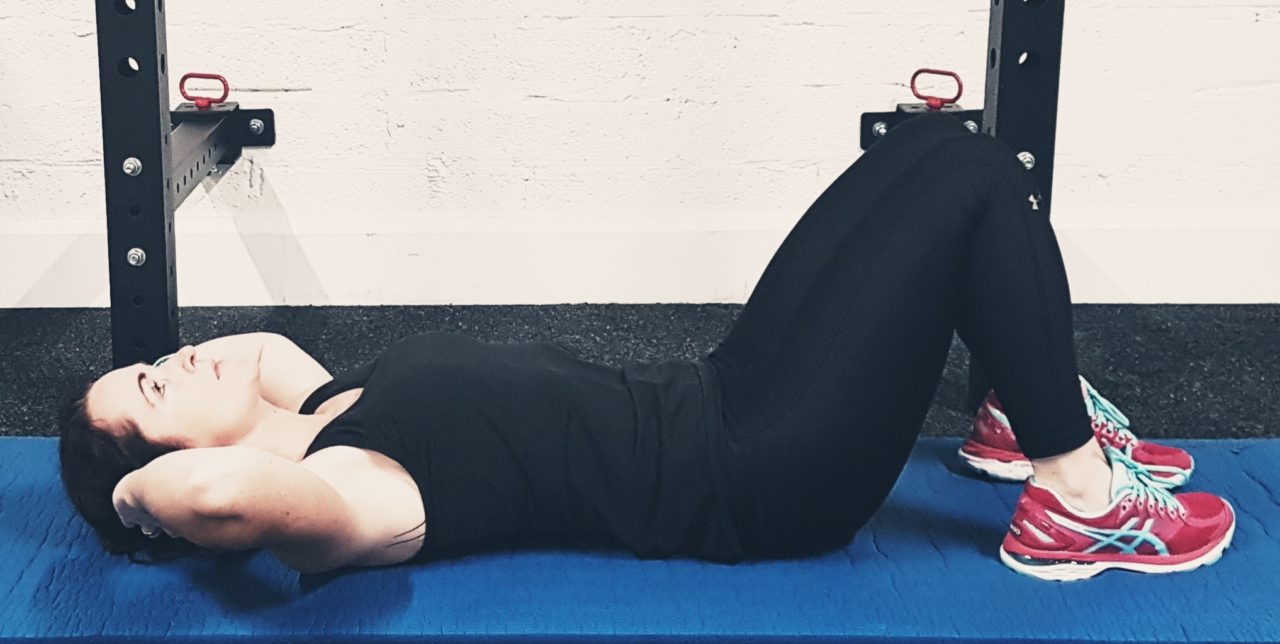
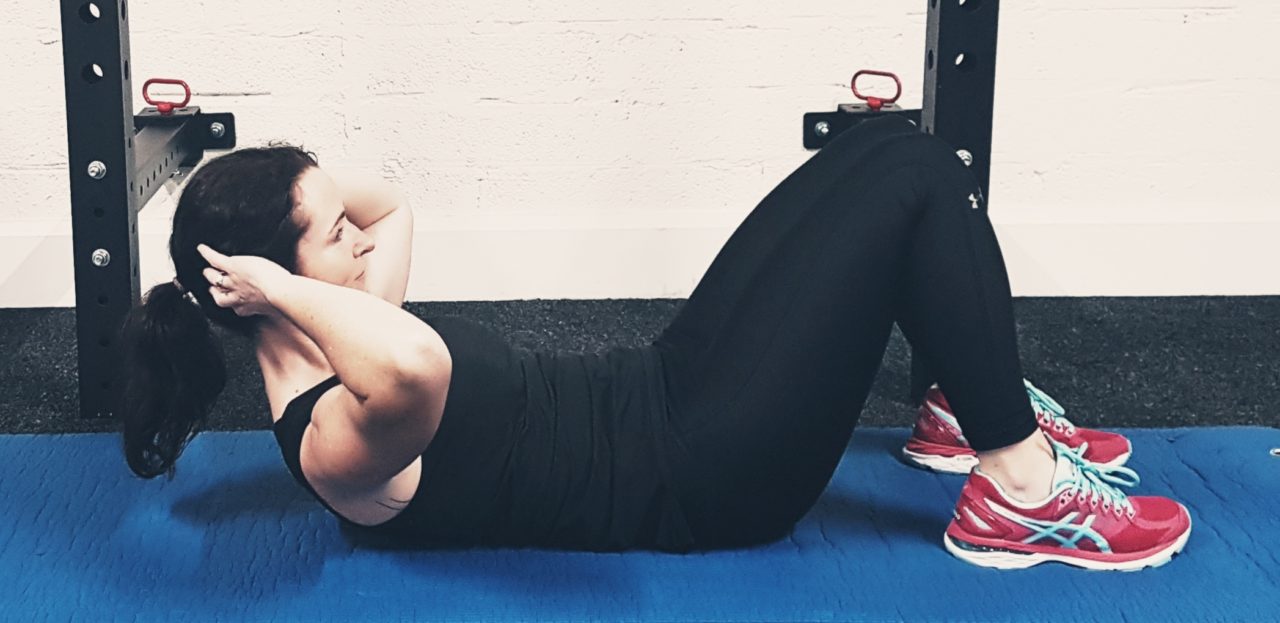
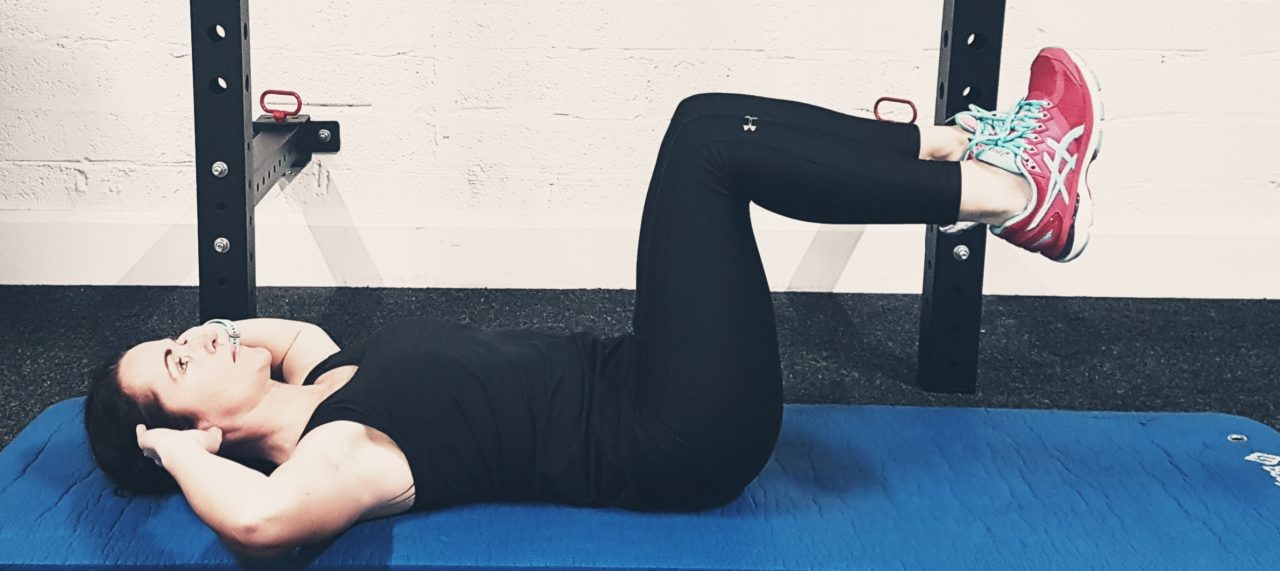
Ab crunches
- Grab a mat and lay down flat on your back. Place your hands gently on your head and bend your knees so that you have a rough 90 degree angle. This will be your starting position.
- To initiate the movement, exhale and curl your shoulders up and off the mat towards your knees by contracting your abdominal muscles. Continue in this fashion until your abdominals cannot be any tighter.
- After a brief pause, inhale and return your body back along the same path into the starting position.
- Repeat for the recommended amount of repetitions.
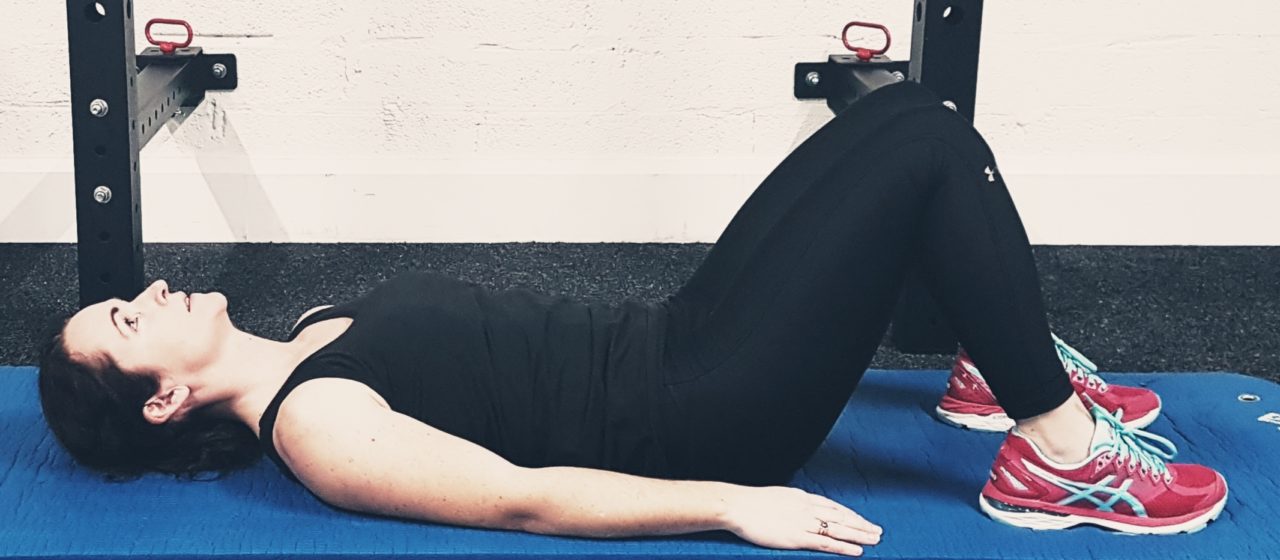
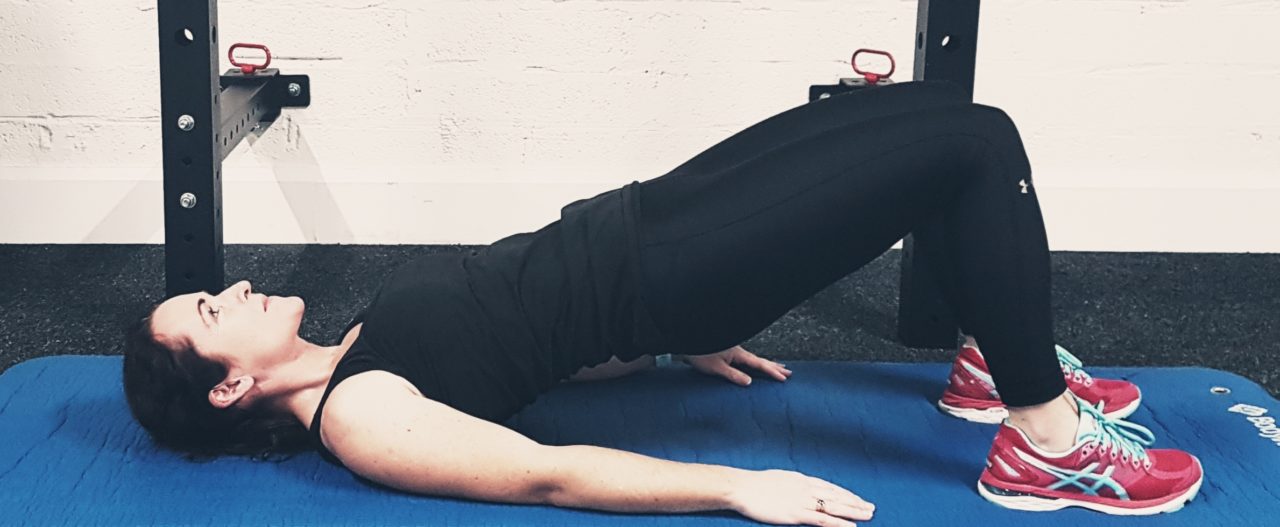
Glute bridge
- Grab a mat and lay down on your back (face up). Have your torso flat on the floor with your arms by your sides. Your feet should be planted on the floor with your knees bent at an acute angle (less than 90 degrees). This is your starting position.
- To initiate the movement, exhale and drive through your heels to lift your hips toward the ceiling by squeezing your glutes. As you do so, lean back onto your shoulders and keep driving upward until your glutes are fully contracted.
- After a brief pause, inhale and gently relax your glutes to drop your pelvis towards the floor (the resistance should be placed through your heels). Continue to drop your pelvis until your glutes touch the floor.
- Repeat for the recommended amount of repetitions.
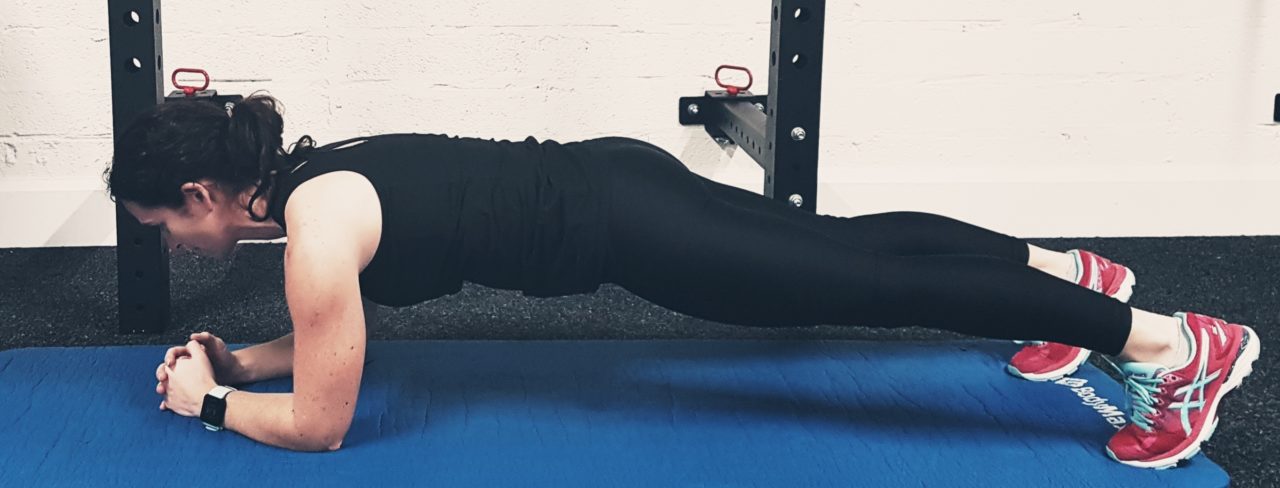
Plank
- Firstly, place a mat on the floor underneath your torso as you adopt an ‘all-fours’ position above it. From here you will need to bend your elbows to a 90 degree angle and place your upper body weight onto your forearms. After you have done that, take a step backwards with your feet and place your remaining bodyweight through your toes. At this point your body should be suspended (in a straight line) above the floor with just your forearms and toes as points of contact. This will be your starting position. Again, for beginners, start on your knees.
- Keep your abdominal muscles tight throughout this exercise and keep your pelvis in line with the rest of your body to minimise risk of injury to your lower back (you can elevate your pelvis slightly to reduce lower back pain).
- Hold this position for as long as you can or for the recommended amount of time.
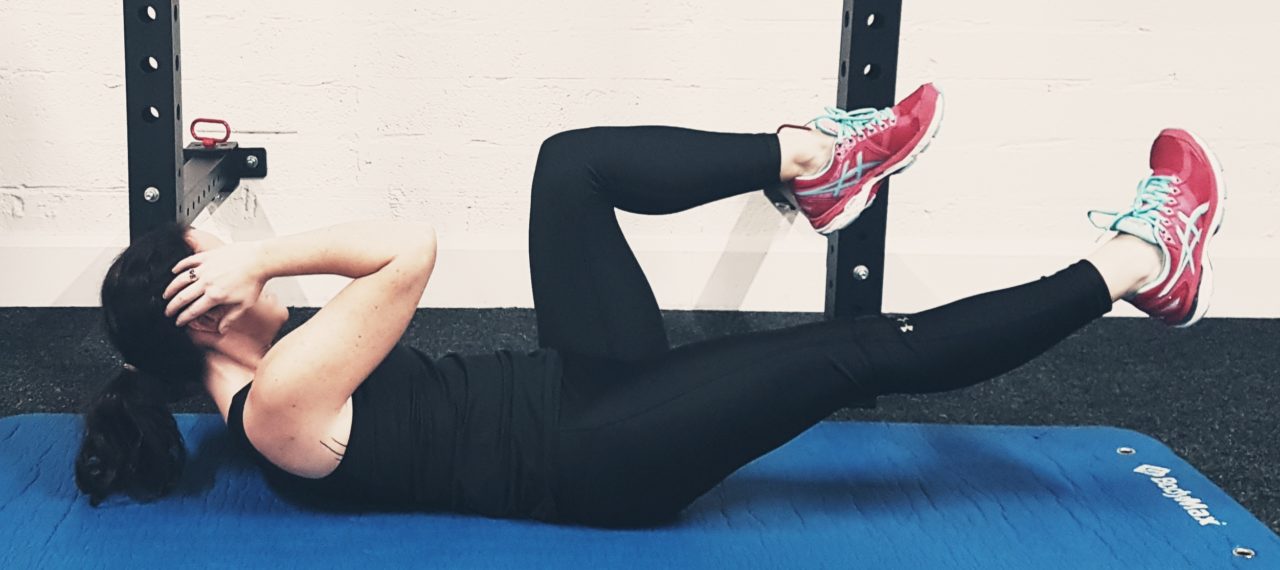
Ab cycle
- Grab a mat and lay down flat on your back. Place your hands gently on your temples and lift your legs so that you have a 90 degree angle at both your hips and knees. Crunch your abs so that you lift your shoulders up from the mat and you are ready to go. This will be your starting position.
- To initiate the movement, you need to simultaneously, bring your right knee up and in towards your body whilst crunching your left shoulder over towards it (exhale as you do this). As you do this extend your left leg to create space for your left elbow.
- Gently inhale and return to the original position. Very briefly pause here and repeat for the opposite side. So exhale and bring your left knee up and in towards your torso whilst crunching your right shoulder over towards it, extending your right leg as you go.
- Continue alternating in this manner until you complete the recommended amount of repetitions.
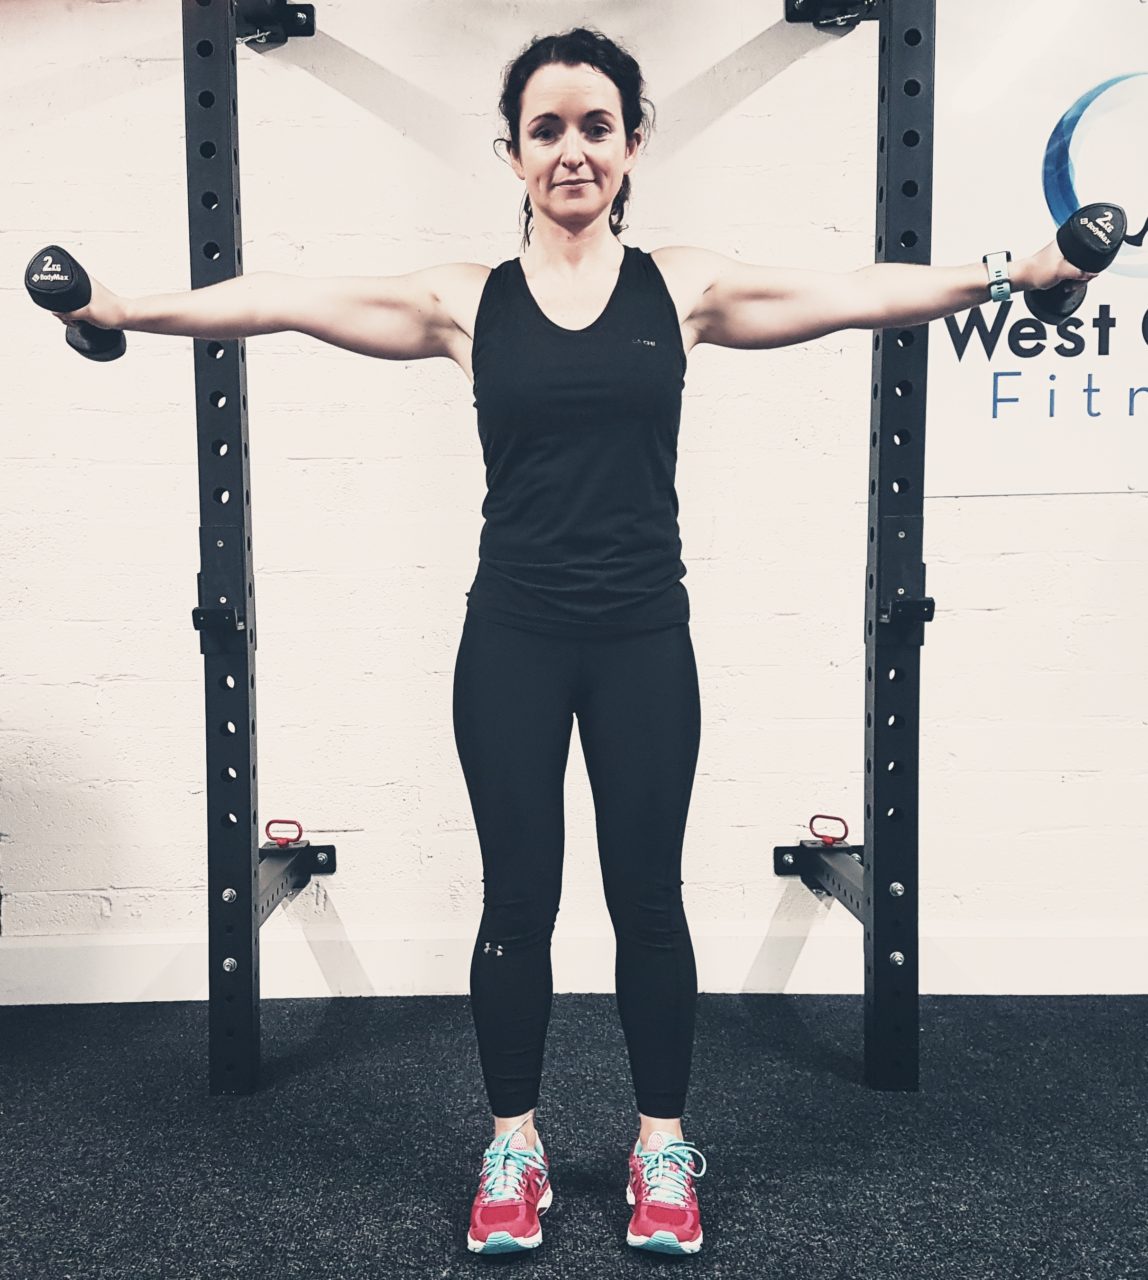
Lateral raise
- Grab two dumbbells with a neutral grip and stand with a shoulder width stance. Make sure you are standing upright with a slight bend at your knees and elbows. Let your arms hang next to you, perpendicular to the floor. This will be your starting position.
- Whilst exhaling and maintaining a stationary torso, lift the dumbbells out to your side, taking them as wide as you can. Continue to lift until your arms are parallel to the floor.
- Pause at the top of the movement for a split second.
- As you inhale, lower the dumbbells to the starting position.
- Repeat for the recommended amount of repetitions.
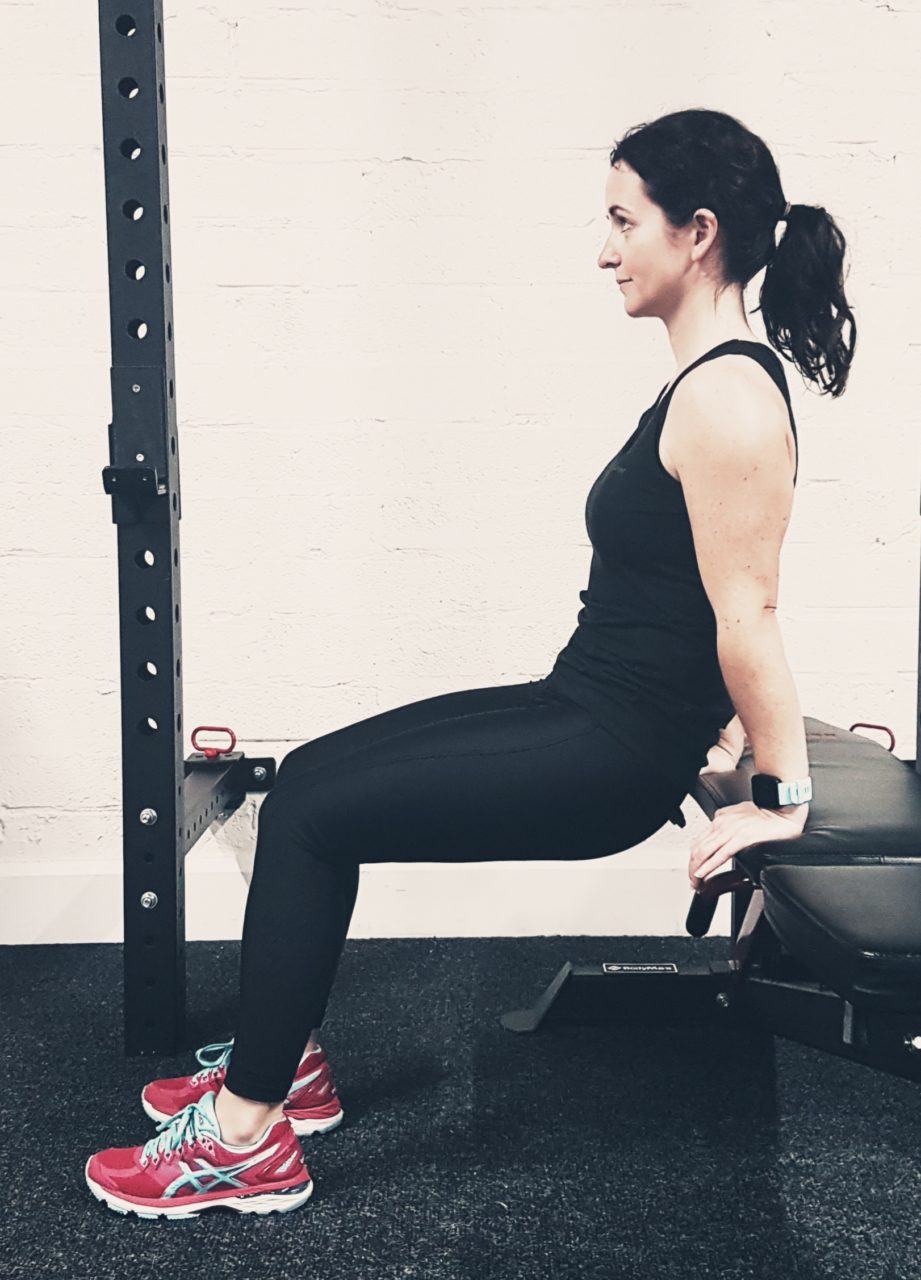
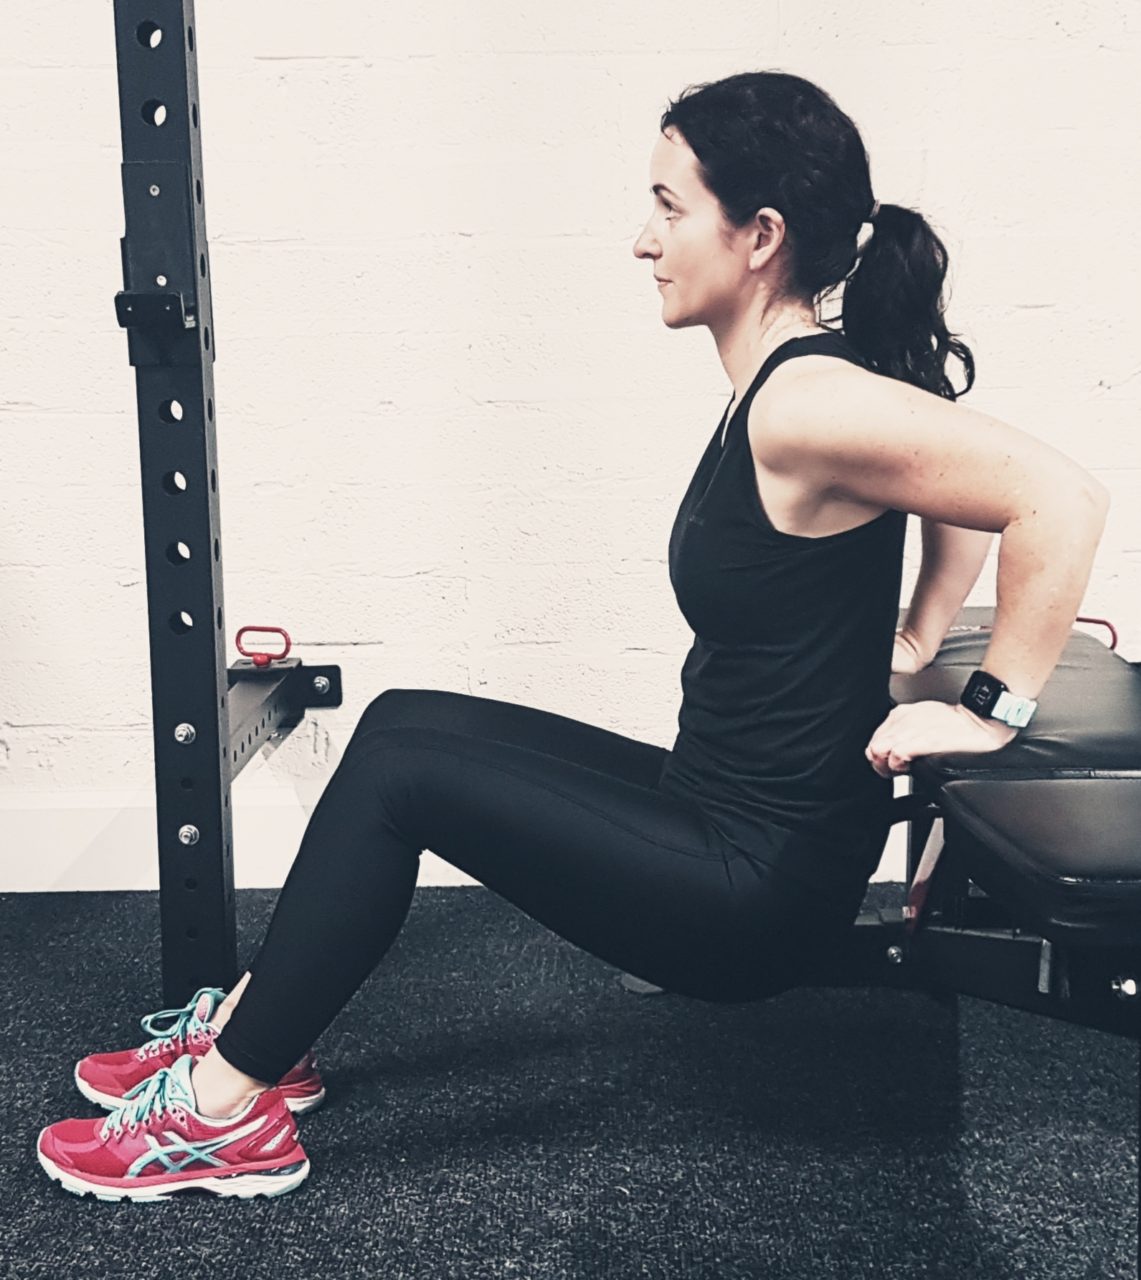
Tricep dips
- Place your hands just wider than shoulder width on the side of a bench and elevate your feet onto a parallel bench. Your legs should be straight with your hips at a 90 degree angle suspended off the floor. This will be your starting position.
- To initiate this movement, inhale and descend your pelvis towards the floor through gently bending your elbows until they create a 90 degree angle.
- Pause for a brief moment in this position, then exhale and flex your triceps to extend your elbows, returning your torso back along the same path into the starting position.
- Repeat for the recommended amount of repetitions.
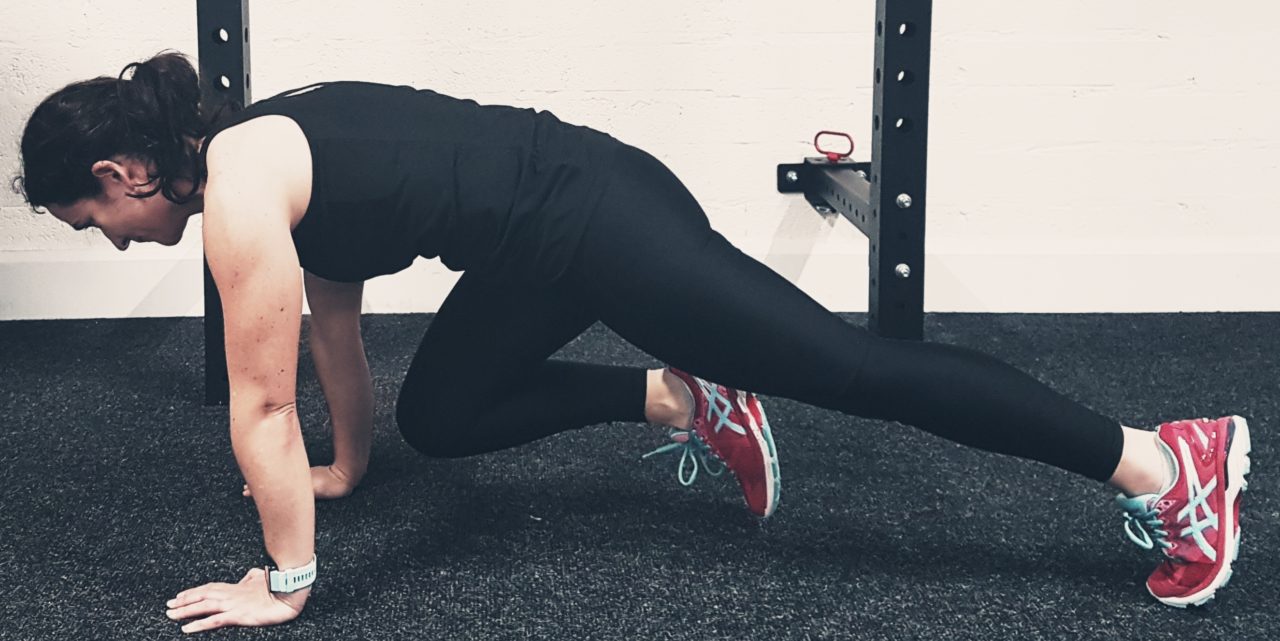
Mountain climbers
- Start off in a press up position with your hands just wider than shoulder width and your toes being the only other point of contact with the floor. Your body should be suspended in a straight line from your heels to your shoulders above the floor. This will be your starting position.
- Bring your right knee underneath your body so that it is as close to your chest as you can get it.
- Exhale and swap your right leg for your left and as fast as you can.
- Continue to alternate your legs and bring each knee in as close to your chest as possible. Tip: Take shallow breaths whilst you are performing the movement.
- Repeat for the recommended amount of repetitions.
Do 15 – 20 reps of each exercise and repeat 3-5 rounds. Take a rest of 45sec’s to 1 minute between rounds. These basic at home exercises can be done anywhere and the intensity of the workout can be varied as your strength and fitness increase. Enjoy every moment of getting your body fit and healthy and looking and feeling great coming up to your big day.
A huge thanks to West Coast Fitness for their expert advice and tips!
